docs.unavlab.com
Main ❯ Underwater wireless voice systems ❯ RedPhone-OS: User’s manual
ℹ Recommendations for printing / saving as PDF
- Press Ctrl+P (macOS: Cmd+P)
- Select "Save as PDF" (Microsoft Print to PDF) as the printer
- In "Pages", enter a range that excludes the first and the last page
- Disable headers and footers (title, URL, page numbers)
- In Chrome/Edge: More settings → "Margins" → None | in Firefox: "Margins & Header/Footer" → None
- Click Print and choose where to save the PDF
 |
 |
|---|---|
| www.unavlab.com support@unavlab.com |
RedPhone-OS Surface station for underwater acoustic voice communication User’s manual |
RedPhone-OS
Surface station for underwater acoustic voice communication
User’s manual
Contents
- 1. Description of the RedPhone-OS station
- 2. Working with the device
- 3. Storage and maintenance
- 4. Obligations and disclaimer
1. Description of the RedPhone-OS station
1.1. Purpose
The surface station for underwater acoustic voice communication RedPhone-OS (hereinafter referred to as the station) is intended for wireless transmission of voice messages from the surface dive control point to divers and for receiving voice messages from divers equipped with wearable underwater telephones that support the same signal parameters as the station.
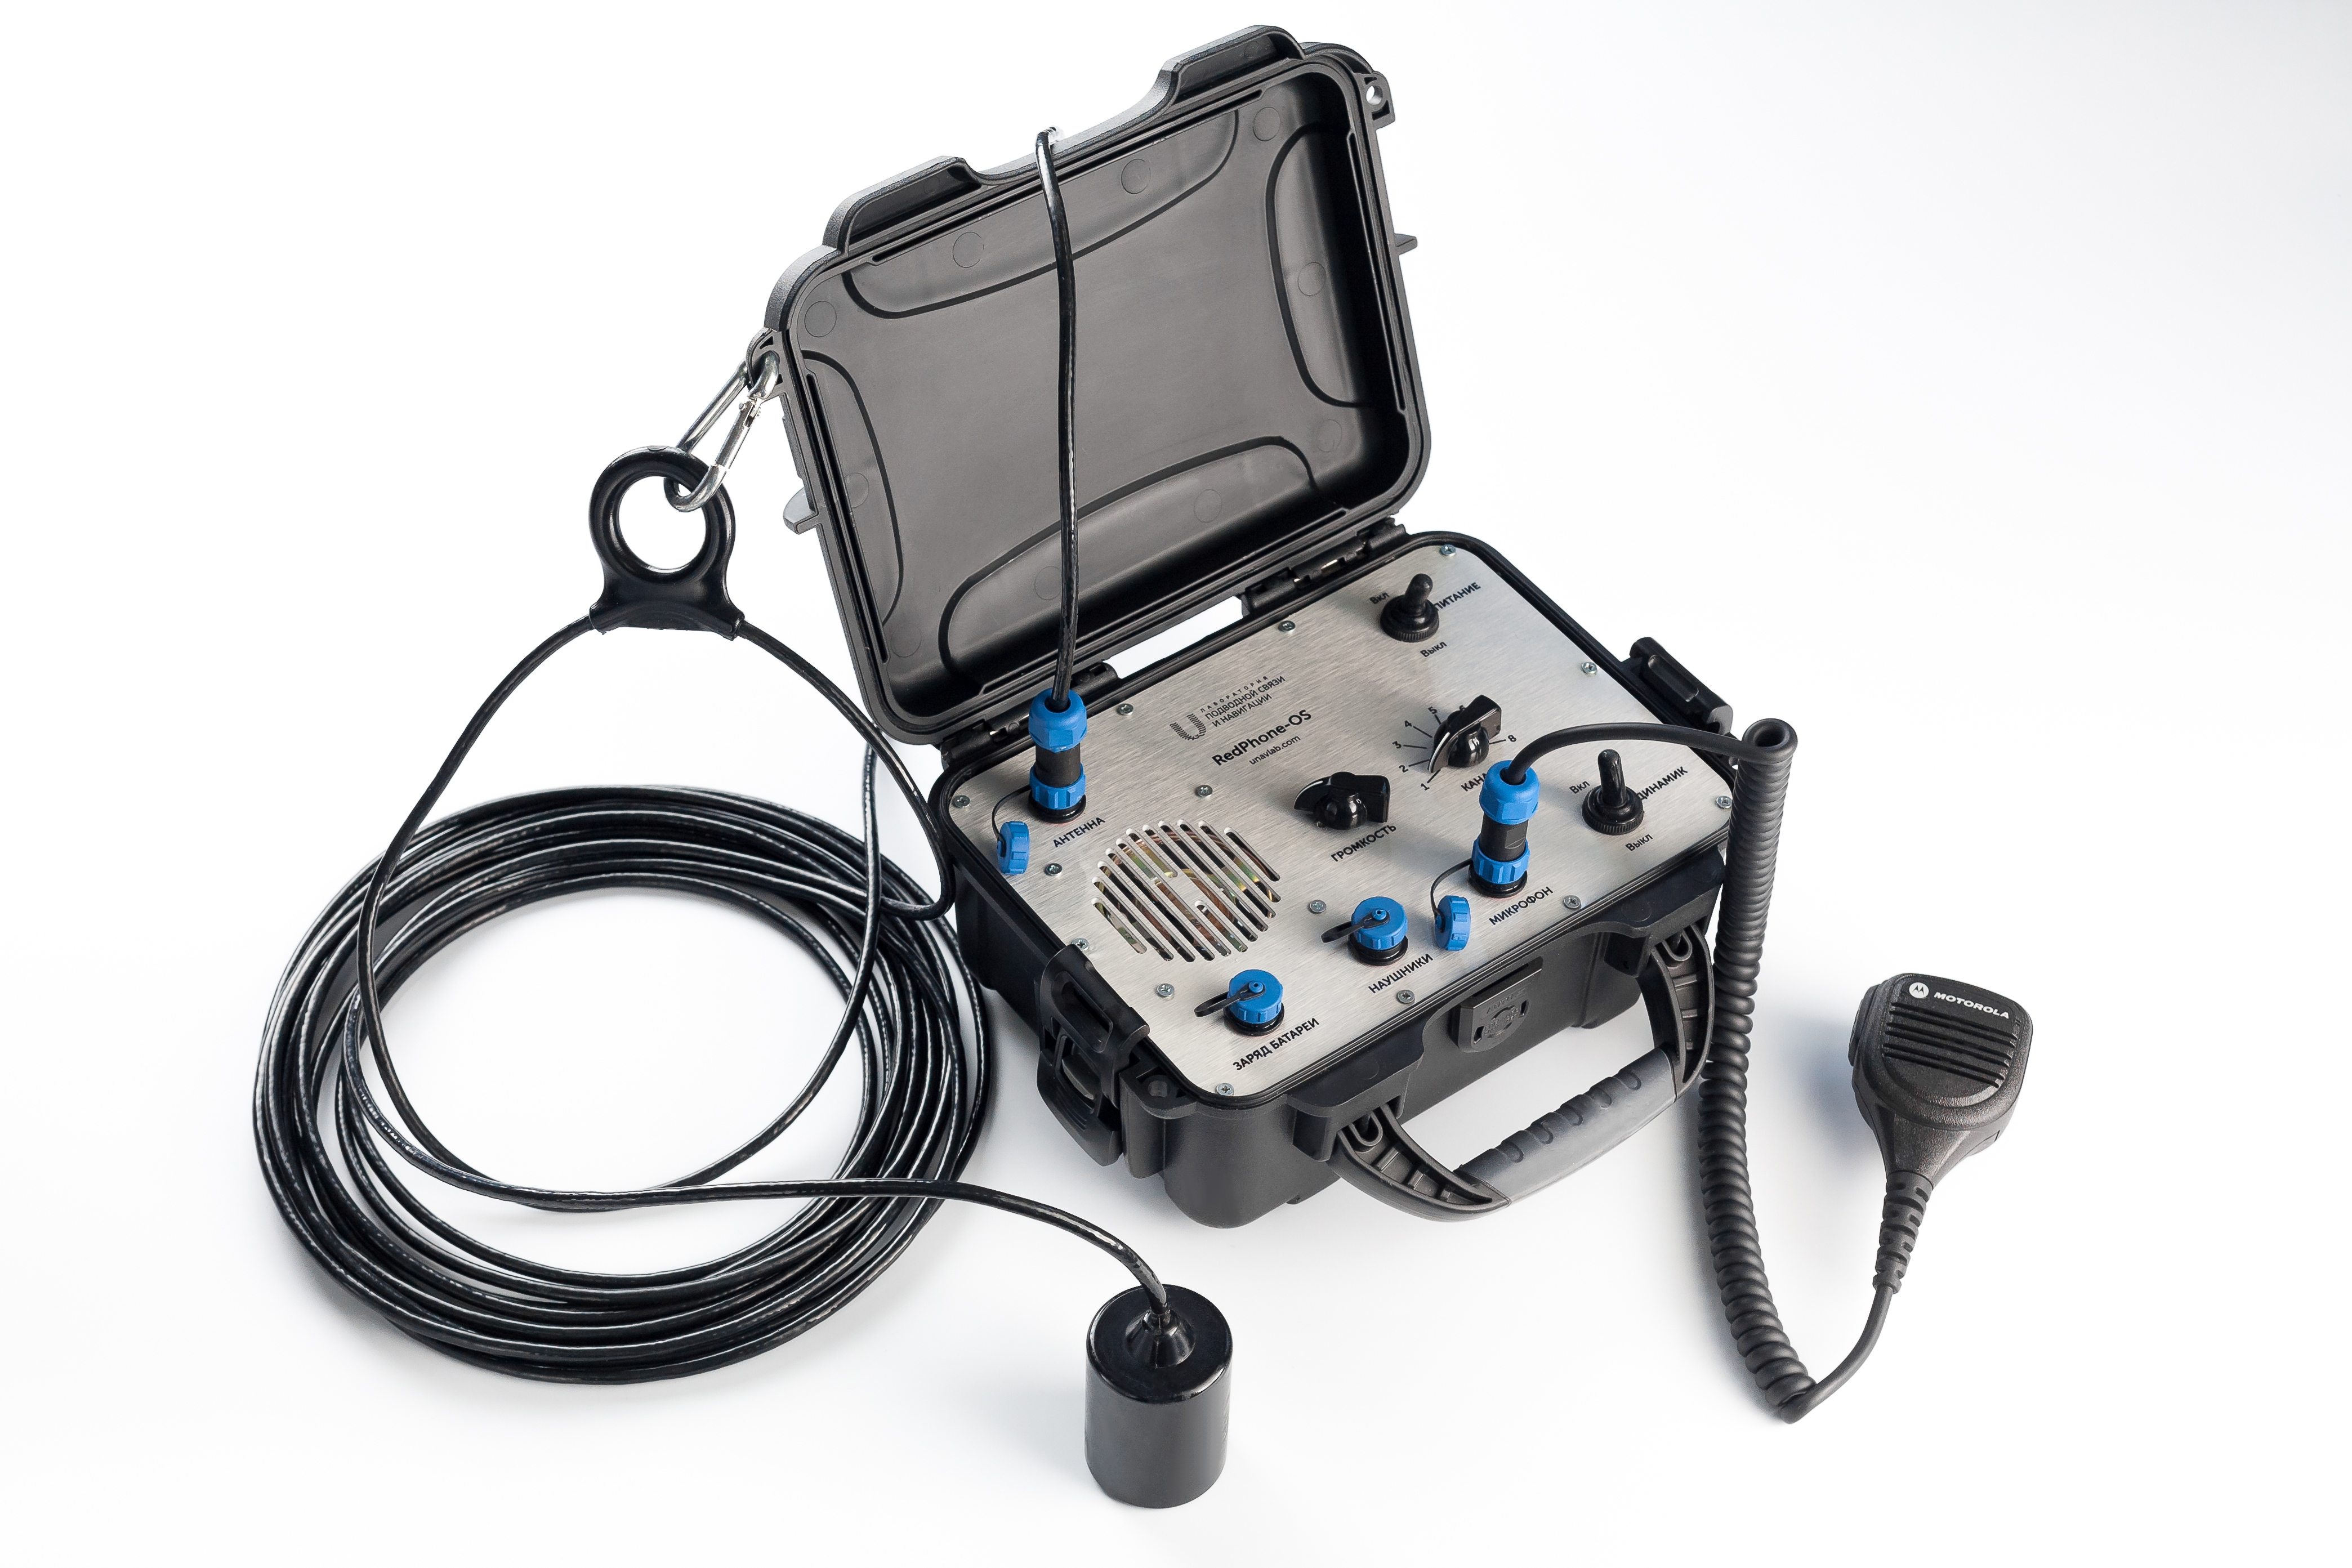
The general view of the RedPhone-OS station, with the transducer and microphone connected, is shown in Figure 1.
 |
|---|
| Figure 1 - General view of the RedPhone-OS station |
For placement and operation at port infrastructure facilities, on ships and small vessels, the device is housed in a shockproof plastic case that provides IP67 protection when the lid is closed. The built-in power supply consists of lithium iron phosphate batteries that operate at sub-zero temperatures and provide more than 1000 charge-discharge cycles.
1.2. Controls and connectors
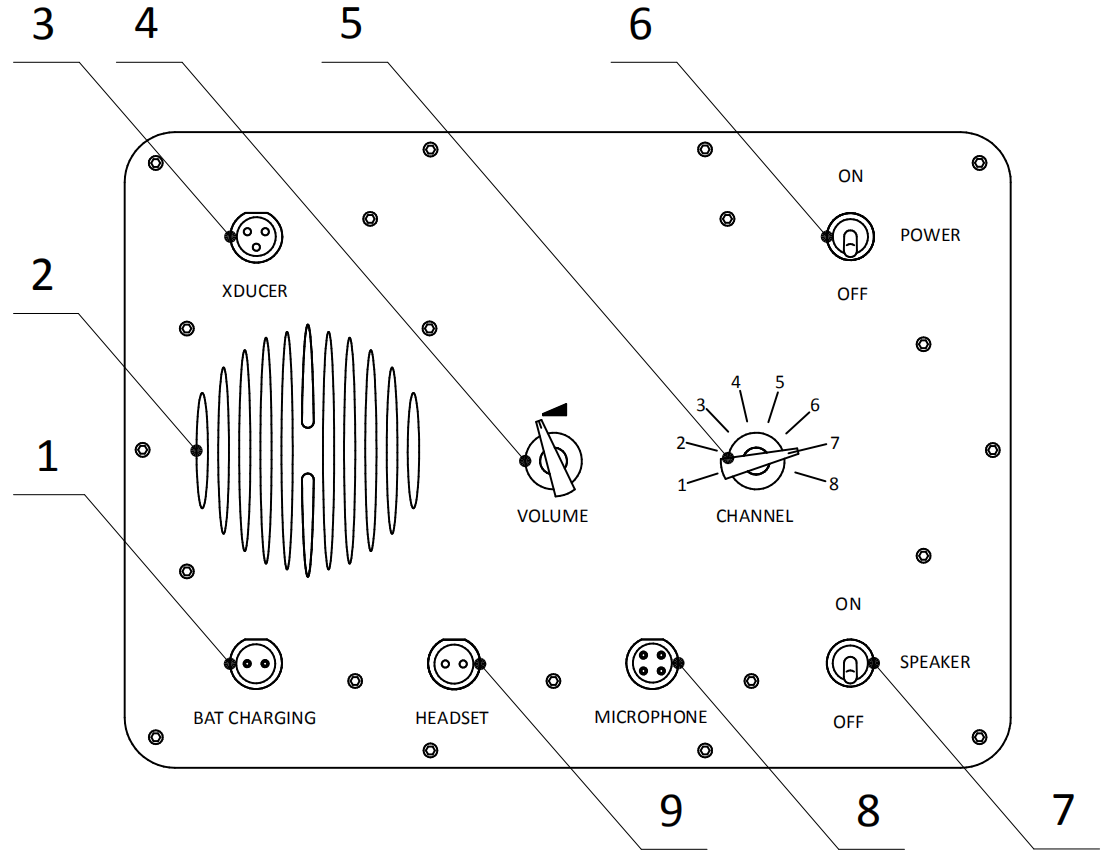
The front panel of the device is made of high-quality stainless steel with laser-engraved markings. Figure 2 shows the location of the controls and connectors.
 |
|---|
| Figure 2 - Location of the controls and connectors |
| 1 - charger connector, 2 - speaker grille, 3 - transducer connector, 4 - volume control, 5 - channel switch, 6 - device power toggle switch, 7 - speaker toggle switch, 8 - microphone and PTT connector, 9 - headphone connector |
1.3. Technical specifications
The station uses single-sideband amplitude modulation (SSB, Single side band) and supports the bands most commonly used in such systems, which ensures compatibility with almost all similar systems. Any antenna, including an underwater acoustic transducer, has a frequency response that describes its sensitivity at different frequencies; therefore, the device provides slightly different receive and transmit sensitivities on different channels. Table 1 shows the correspondence of the station channel numbers to frequency bands, as well as the degree to which each channel matches the characteristics of the transducer and the transceiver path. Unless there is a pressing need to use a particular channel, for example, to ensure compatibility with devices from other manufacturers, give preference to the channels that best match the characteristics of the transducer.
Table 1 - Correspondence of the channel number and signal parameters
| Channel number | Carrier frequency, Hz | Sideband | Bandwidth, Hz | Match with the characteristics of the transceiver path |
|---|---|---|---|---|
| 1 | 32768 | Lower | 28468 .. 32468 | Good |
| 2 | 32768 | Upper | 33068 .. 37068 | Satisfactory |
| 3 | 31250 | Lower | 26950 .. 30950 | Excellent |
| 4 | 31250 | Upper | 31550 .. 35550 | Good |
| 5 | 28500 | Lower | 24200 .. 28200 | Excellent |
| 6 | 28500 | Upper | 28800 .. 32800 | Excellent |
| 7 | 25000 | Lower | 20700 .. 24700 | Satisfactory |
| 8 | 25000 | Upper | 25300 .. 29300 | Excellent |
The manufacturer is constantly improving the equipment, so the up-to-date technical specifications are given in the device specification:
Table 2 - Links to the current device specification
| Device specification: RedPhone-OS |
1.4. Delivery set
This subsection describes the standard delivery set (see Table 3). By separate agreement with the manufacturer, a transducer with an extended cable can be supplied.
Table 3 - Standard delivery set of RedPhone-OS
| No. | Name | Quantity | Notes |
|---|---|---|---|
| 1 | RedPhone-OS station | 1 pc. | |
| 2 | Underwater acoustic transducer | 1 pc. | 7 m cable |
| 3 | Microphone with PTT button | 1 pc. | |
| 4 | Mains charger | 1 pc. | |
| 5 | Carabiner for securing the transducer cable | 1 pc. | |
| 6 | Waterproof bag for transporting and storing the transducer and microphone | 1 pc. | |
| 7 | Adapter with a 3.5 mm Jack socket for connecting headphones | 1 pc. |
2. Working with the device
2.1. Preparation for operation
- Place the station on a stable non-slip horizontal surface;
- Tie the station by the case handle with a safety cord to a guardrail, railing, etc. to prevent the station from tipping over into the water;
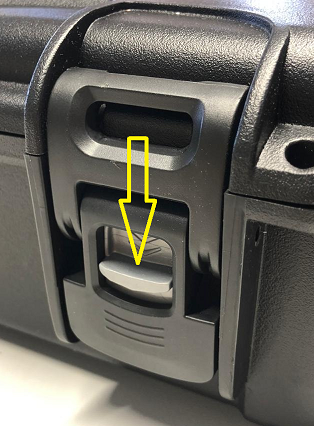
- Open the station lid by pressing the lock safety catches down (see Figure 3):
 |
|---|
| Figure 3 - Lock safety catch |
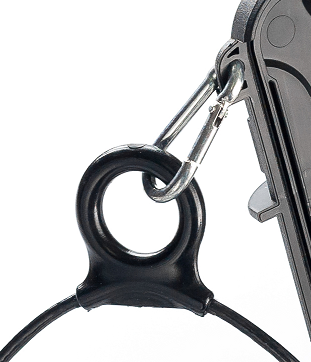
- Secure the transducer cable with the carabiner, as shown in Figure 4, to relieve the transducer connector of strain from possible jerks and pulling. The cable may also be secured by its load-bearing eye with a polymer cord at least 4 mm thick.
 |
|---|
| Figure 4 - Securing the transducer cable |
2.2. Test procedures
2.2.1. External visual inspection
Perform this inspection with the station lid open. During the inspection, check that:
- The protective caps on the “Speaker” and “Power” toggle switches on the front panel of the station are intact;
- There is no water, salt deposits or other contamination inside the connectors on the front panel of the station and the mating connectors (transducer, microphone, headphones (if used));
- The insulation of the transducer and microphone cables is intact;
If the observed conditions do not match the expected ones, operation of the station is prohibited!.
2.2.2. Functional check of the device
Perform this check after a successful visual inspection in accordance with section 2.2.1.
Additional check conditions:
- the “Power” toggle switch is set to the “Off” position;
- the “Speaker” toggle switch is set to the “On” position;
- the “Volume” control is set to the 12 o’clock position (50% of the scale);
During the check, make sure that:
- When the “Power” toggle switch is moved to the “On” position, the station emits a short beep, indicating that power is present and the device is operational;
After the check, move the “Power” toggle switch to the “Off” position.
If the observed conditions do not match the expected ones, operation of the station is prohibited!.
2.2.3. Checking the transducer and microphone
Perform this check after the successful checks in accordance with section 2.2.1 and section 2.2.2.
Additional check conditions:
- the “Power” toggle switch is set to the “Off” position;
- the “Speaker” toggle switch is set to the “On” position;
- the “Volume” control is set to the 12 o’clock position (50% of the scale);
- the supplied transducer is connected to the “Antenna” connector on the front panel of the station;
- the supplied microphone is connected to the “Microphone” connector;
- the PTT button (PTT, Push-to-talk) on the microphone is not pressed;
During the check, make sure that:
- When the “Power” toggle switch is moved to the “On” position, the station emits a short beep, indicating that power is present and the device is operational;
- A constant background noise is heard from the station speaker, and its intensity may vary;
- When the transducer is touched, the station responds with a change in the noise (for example, when the transducer is tapped lightly, these clicks should be heard from the station speaker);
- When the PTT button is pressed, the noise from the speakers stops completely (transmission is in progress), and when it is released, the station emits a short beep, after which the background noise may be heard again;
After the check, move the “Power” toggle switch to the “Off” position.
If the observed conditions do not match the expected ones, operation of the station is prohibited!.
To check the headphones, the “Speaker” toggle switch must be in the “Off” state and all sound signals, including the background noise, must be monitored through the headphones using the procedure described above.
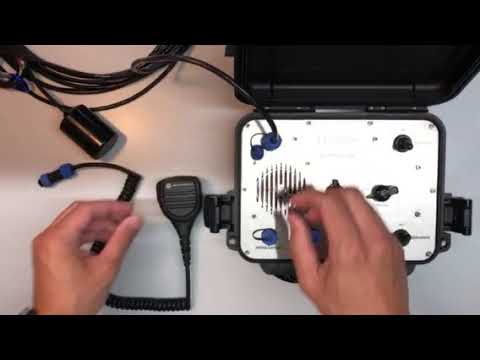
Video tutorial: checking the RedPhone-OS station before use
2.2.4. Immediately before operation
Perform this check after the successful checks in accordance with sections 2.2.1 to 2.2.3.
Make sure that:
- The station is placed on a stable non-slip horizontal surface and tied by the handle to a guardrail, railing, etc. to prevent the station from tipping over into the water;
- The device lid is open;
- The transducer is connected to the “Antenna” connector;
- The microphone is connected to the “Microphone” connector;
- If the station is used without headphones:
- The “Speaker” toggle switch is in the “On” position;
- If the station is used with headphones:
- The “Speaker” toggle switch is in the “Off” position;
- The headphones are connected to the “Headphones” connector;
- The covers of all unused connectors are lightly screwed on;
- The nuts on all connected cable connectors are lightly tightened;
- The “Power” toggle switch is set to the “On” position;
- The “Channel” switch is set to the position corresponding to the communication channel set on the divers’ devices;
- The transducer is lowered into the water to a depth such that it is at least 2 m from the lowest point of the vessel and at least 1.5 m from the bottom;
- There is a direct line of sight between the station transducer and the transducers of the diver stations (not obstructed by elements of the underwater landscape, parts of various structures, vessels, etc.).
2.3. Operation
Before operation, all the preparations and checks provided for in section 2.2 must be carried out.
Underwater acoustic voice communication with divers is half-duplex: transmission and reception alternate; while the device is in transmit mode, it cannot receive incoming messages.
2.3.1. Sound signals
The possible sound alerts are summarized in Table 4.
Table 4 - Sound alerts
| Alert description | What it signals | Example |
|---|---|---|
| Short rising and then falling tone | The station is switched on and enters receive mode | Sound example |
| Short rising tone | Switch to receive mode after transmission is completed (the PTT button is released) | Sound example |
| Short falling tone (~ every 30 seconds) | Low charge of the built-in power supply |
2.3.2. Receiving voice messages
To receive voice messages from divers, the PTT button on the microphone must be released. Incoming messages are then played through the device speaker (or through the headphones if they are connected and the “Speaker” toggle switch is in the “Off” state).
The volume of incoming voice messages depends on the distance between the station transducer and the diver and on the hydrological conditions. It may decrease when a diver enters an acoustic shadow zone (when elements of the underwater landscape, parts of structures, vessels, algae, etc. are in the signal path).
The user must set a comfortable volume level with the “Volume” control according to the current communication conditions.
2.3.3 Sending voice messages
To send a voice message, perform the following steps:
- Hold the microphone with its grille 0.5–2 cm from your mouth;
- Press the PTT button;
- Pause briefly (~0.5 seconds) to let the station switch to transmit mode;
- Speak the voice message clearly, with distinct articulation; it is recommended to end the voice message with the word “Over!” to signal to the recipient that the message has ended;
- Pause briefly (~0.5 seconds);
- Release the PTT button;
- The station emits a short beep, indicating that the device has switched to receive mode.
2.4. Shutdown
After operation, perform the following steps in this order:
- Move the “Power” toggle switch to the “Off” position;
- Haul in the transducer cable;
- Perform the following actions only if there is no risk of water getting into the open connectors:
- Disconnect all connectors;
- Screw on the protective covers of all connectors;
- Detach the carabiner of the load-bearing eye from the device lid;
- Close the device lid.
3. Storage and maintenance
3.1. Storage and maintenance conditions
The station and the supplied equipment (transducer, microphone and charger) have no special storage requirements, except for the following:
- Storage at a temperature from -20 °C to 60 °C;
- All connectors are disconnected, the protective covers are lightly screwed on, the station is switched off (the “Power” toggle switch is in the “Off” position), the device lid is closed;
- For long-term storage (more than a month), it is recommended to recharge the built-in power supply of the station;
- If moisture gets on the speaker cone, it should be removed by turning the station over so that the speaker grille faces down; the remaining moisture should be left to evaporate naturally;
- A brief rinse with a weak stream of water is allowed with the connector covers closed;
- Mechanical impact on the speaker cone is not allowed;
- To remove contamination from the device housing, a weak solution of household detergents may be used with the connector covers and the device lid closed;
- Moisture getting into the connectors of the transducer, microphone, headphones, charger and the adapter for connecting headphones is not allowed;
- Bending the transducer cable to a radius of less than 5 cm is not allowed;
- Exposure of the microphone to moisture is not allowed; any moisture that gets on it must be removed with a dry absorbent cloth, after which the device must dry for at least 8 hours in a dry room at a temperature from 15 °C to 50 °C and a relative humidity of no more than 50%;
- The transducer and microphone are stored and transported in the supplied waterproof bag;
- Before placing the transducer and microphone into the supplied transport bag, all moisture must be completely removed from them.
PROHIBITED:
- OPENING THE EQUIPMENT FROM THE DELIVERY SET LISTED IN section 1.4.
- ALLOWING PERSONS WHO ARE NOT FAMILIAR WITH THESE INSTRUCTIONS TO USE THE EQUIPMENT FROM THE DELIVERY SET LISTED IN section 1.4.
- ALLOWING PERSONS WHO HAVE NOT REACHED THE AGE OF MAJORITY TO USE THE EQUIPMENT FROM THE DELIVERY SET LISTED IN section 1.4.
- ENABLING TRANSMIT MODE (PRESSING THE PTT BUTTON ON THE MICROPHONE) WHEN THE TRANSDUCER IS NOT CONNECTED
3.2. Charging the built-in power supply
The built-in power supply of the station may be charged only with the supplied charger, with the station switched off (the “Power” toggle switch in the “Off” position) and all other connectors disconnected. Before using the charger, read the charger’s operating instructions.
4. Obligations and disclaimer
4.1 Terms of replacement and free warranty service
The manufacturer’s warranty covers only factory defects that appear during operation of the device in accordance with this manual during the warranty period (2 years from the date of purchase).
The manufacturer guarantees free repair or replacement of faulty equipment from the delivery set that has failed due to a factory defect.
The grounds for refusing free warranty service, free repair and replacement include:
- any mechanical damage to the equipment from the delivery set specified in section 1.4., including damage to the insulation of wires and cables;
- any damage caused by exposure to moisture and contamination due to improper use of the equipment from the delivery set specified in section 1.4.: moisture getting into the connectors, inside the microphone, the adapter for connecting headphones, etc.
- any electrical damage caused by the use of accessories not included in the delivery set (transducer, microphone, adapter for connecting headphones, headphones with a resistance lower than that specified in the device specification, charger); accessories supplied by the manufacturer or its representative to replace faulty or lost ones are not considered to be outside the delivery set;
- any traces of unauthorized repair and/or opening of the equipment from the delivery set specified in section 1.4..
4.2 Limitation of the manufacturer’s liability
ANY PARTS OF THE DELIVERY SET LISTED IN section 1.4., SEPARATELY AND AS PART OF A SYSTEM, HEREINAFTER REFERRED TO AS THE “SUPPLIED EQUIPMENT”:
- WERE NOT DEVELOPED AS A MEANS OF RESCUE
- WERE NOT TESTED AS RESCUE EQUIPMENT
- ARE NOT RESCUE EQUIPMENT
- THE MANUFACTURER DECLARES THAT THE SUPPLIED EQUIPMENT IS SAFE WHEN USED IN ACCORDANCE WITH THESE INSTRUCTIONS AND IS NOT RESPONSIBLE FOR ANY CONSEQUENCES OF THE USE OF THE SUPPLIED EQUIPMENT