docs.unavlab.com
Main ❯ Navigation & tracking systems ❯ RedNAV Host software: User’s manual
| www.unavlab.com support@unavlab.com |
RedWAVE - underwater acoustic navigation system RedNAV Host sorftware: User’s manual |
RedNAV Host software:
User’s manual
Contents
1. Introduction
This manual describes the process of connecting a diver’s navigation receiver RedNAV to a PC. PC system requirements for connecting the device:
- Windows 10 OS with installed .NET Frameworks 4.5
- Bluetooth-module
2. Establishing bluetooth-connection
The Bluetooth adapter must be turned on on the PC, the diver’s navigation receiver RedNAV is installed on the charging pad connected to the power. Below is the sequence of steps for establishing a Bluetooth connection using a PC with Windows 10 as an example.
- Open the menu Start -> Settings -> Devices
- Verify that the Bluetooth switch is On
- Press + Add Bluetooth or other device
After the system detects a new device, it will be displayed in the list, as in Figure 1.
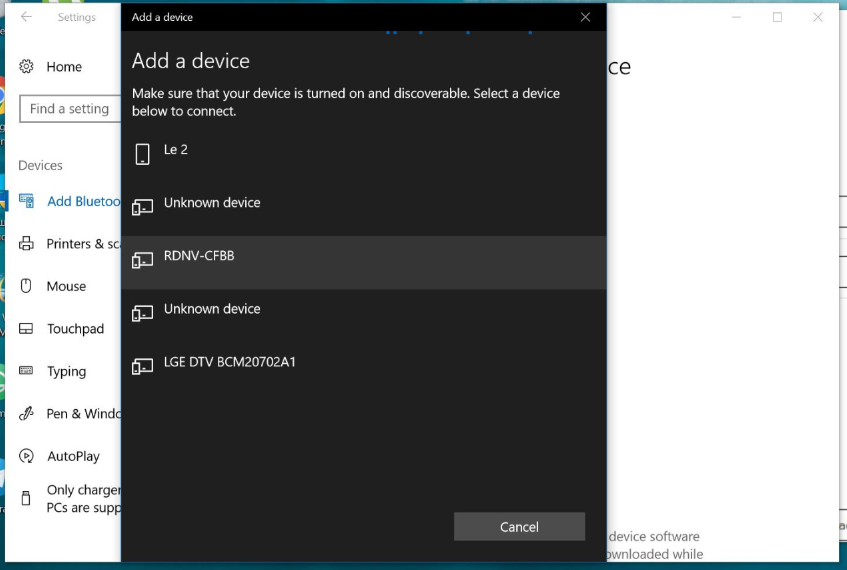 |
| Figure 1 - Search results for new devices |
In Figure 1 The list shows the name of the device, which is visible on the screen of the device itself (in the example RDNV-CFBB). Further, when the user clicks Pair, the system prompts the user to enter a PIN code (shown in Figure 2).
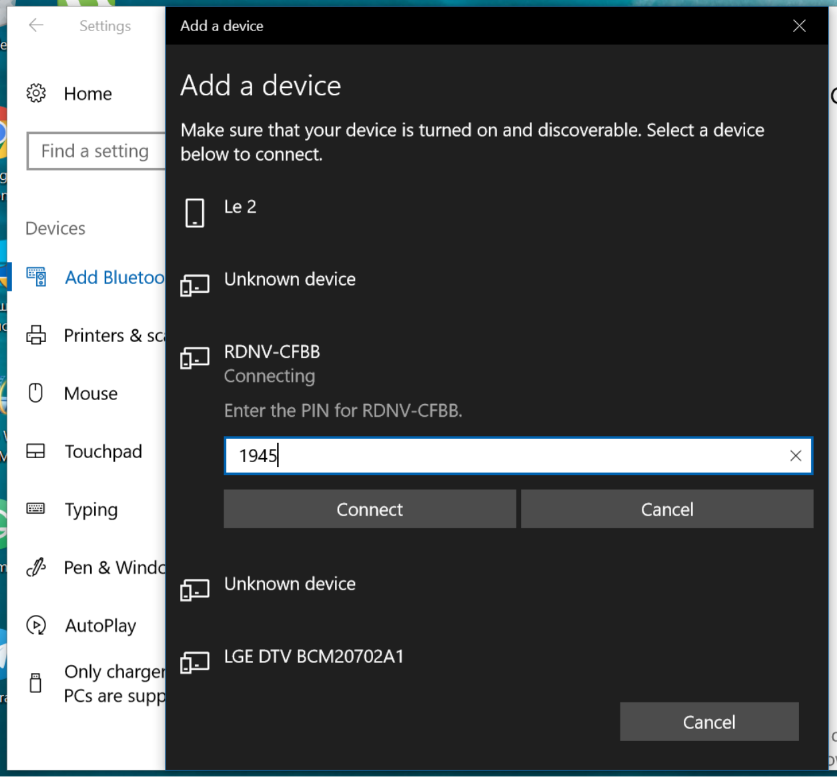 |
| Figure 2 - Dialog for entering a PIN code |
The pin code is displayed on the device screen, which the user must enter to create a connection with the device (1945 in the example). After entering the PIN code and pressing the Next button system will establish connection. Wait for the connection to the device to be established. After which the dialogue box should look like in Figure 3. Device Status: Connected.
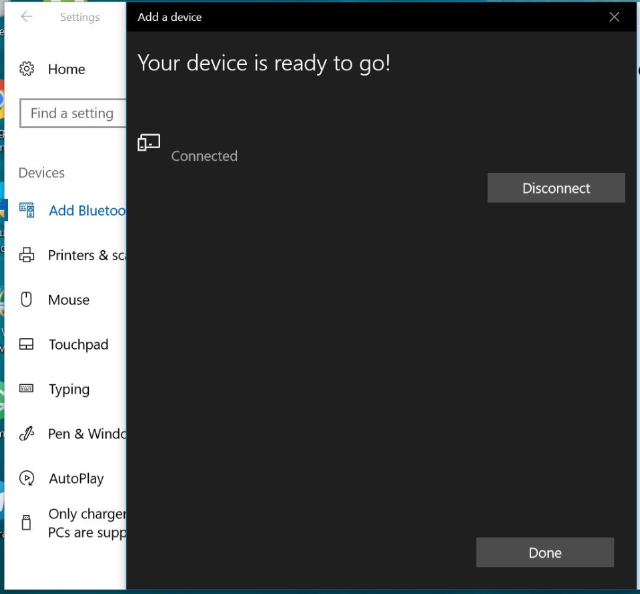 |
| Figure 3 - Device is connected |
At this stage, communication with the device is established.
3. Using RedNAV Host software
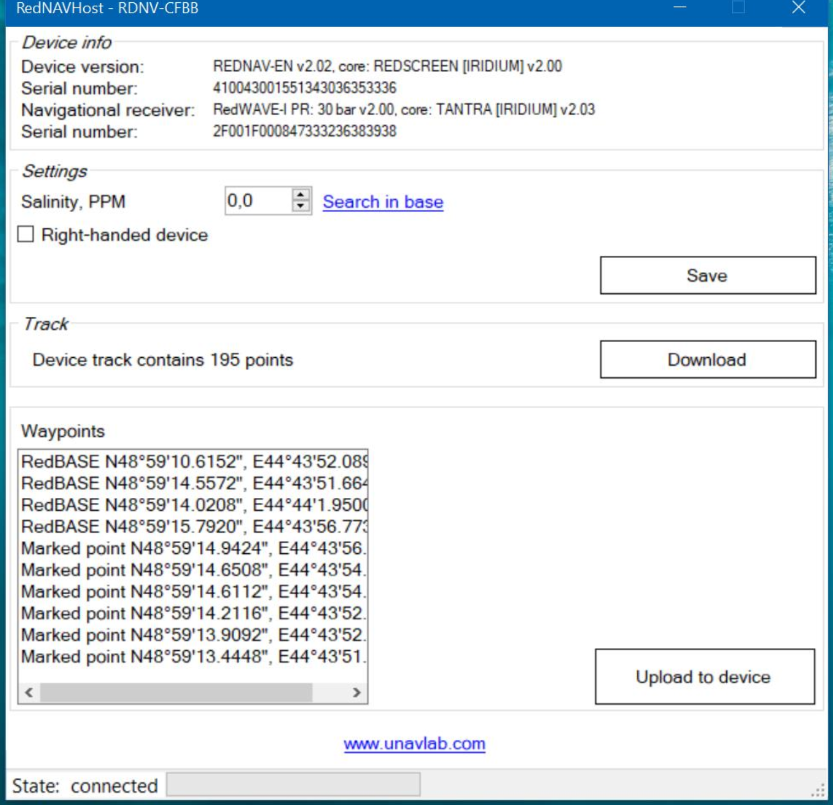
After connecting the device according to p. 2., The user can start the RedNAV Host application and it will establish a connection with the device automatically. If the connection is successful, the “Connected” status will be displayed in the application window in the status bar, as illustrated in Figure 4. The device name appears in the window title (in the example RDNV-4B8C).
The upper lines display information about the device version and its serial number. Information on the version of the navigation receiver and its serial number is displayed below. This information is only available if the device has been put into service mode from the state “On”.
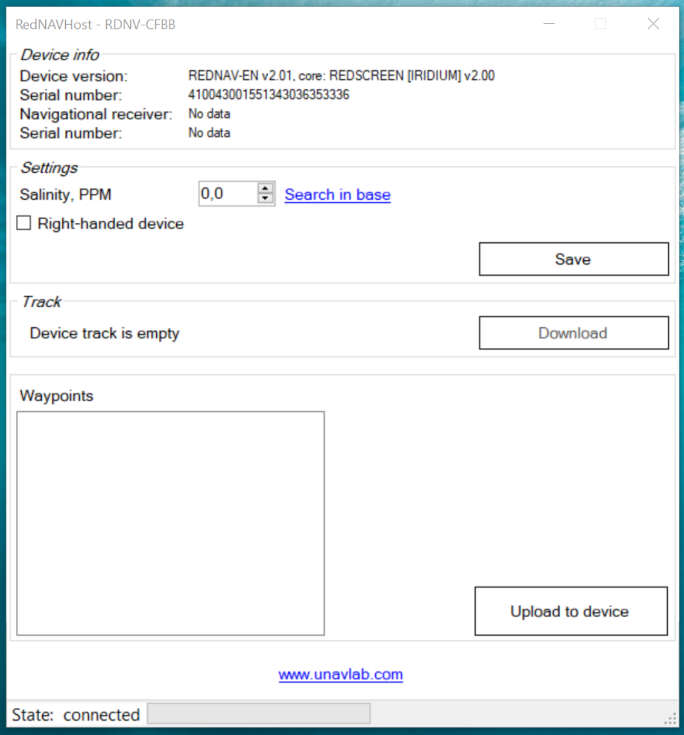 |
| Figure 4 - RedNAV Host main window |
| Device is connected and recognized by the software |
After connecting, the user can change the settings. Diver’s navigation receiver has a minimum number of settings. In particular, for correct operation, only water salinity value is required.
If the work is planned in freshwater, it is recommended to leave the default value - 0 PSU. For convenience, the application contains a database of world ocean salinity for points with steps of 1˚ in latitude and longitude.
To search for the salinity of water body, it is required to enter the geographical coordinates of the place in the dialogue called by the link Search in the base, the main application window.
Figure 5 shows a view of this dialogue. After entering the coordinates of the place (a one-degree accuracy is sufficient) and pressing the Search button, the salinity value at the nearest known point with the measured salinity will be displayed.
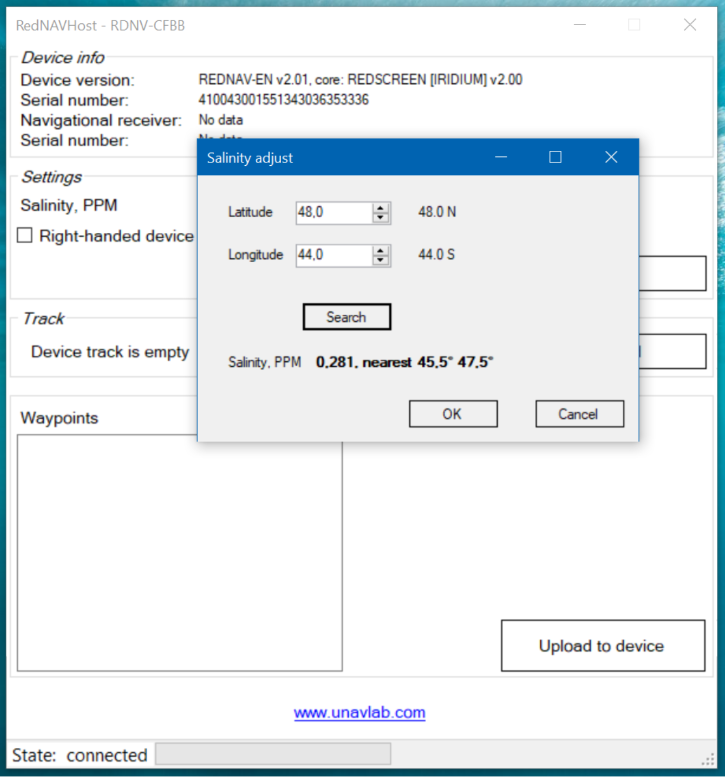 |
| Figure 5 - Water salinity dialogue |
When OK button is clicked, the found value will be placed in the settings field of the main window.
In addition, it is possible to adjust the flip of the device screen with exchanging the functions of the buttons. This function is designed to enable the device to be mounted on the right hand. To enable this function, Screen flip check-box in the main application window should be checked.
To download the settings to the device, the Save button (see Figure 5) should be clicked. The button Download (see Figure 4) serves for downloading tracks, buoy positions and saved points from the device. This situation is illustrated in Figure 6.
 |
| Figure 6 - Downloading tracks from the device |
After pressing the Download button, while the tracks are downloading from the device, the other buttons will become unavailable, and the operation progress will be displayed in the application status bar.
After the download is completed, the application will offer to save the downloaded data using the standard system dialogue. At the same time, a name composed of the current system time and date will be offered as the file name, which is illustrated by Figure 7. The application allows saving tracks in Keyhole Markup Language (KML) format. Tracks can then be imported into map software (e.g. Google Earth, SAS.Planet etc.).
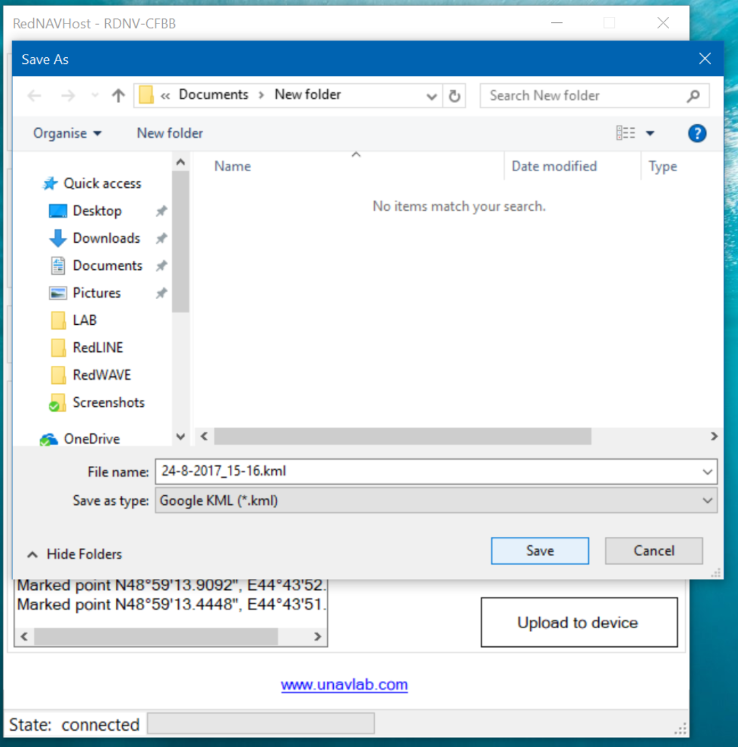 |
| Figure 7 - Tracks saving dialogue |
After saving data, the application will ask the user whether to clear the track from the device.
ATTENTION! After clearing tracks from the device, it will not be possible to restore the track. Absolutely.
Work with waypoints is done using the context menu, called with the right mouse button on the group Waypoints, as shown in Figure 9.
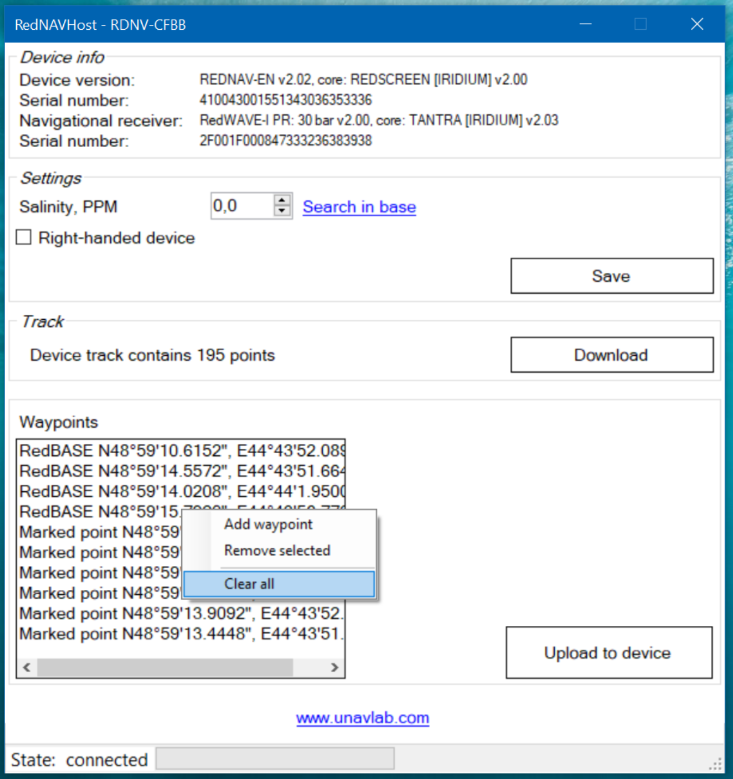 |
| Figure 8 - Working with waypoints |
Manually added waypoints can be edited using the panel on the right when the added point is selected (see Figure 9).
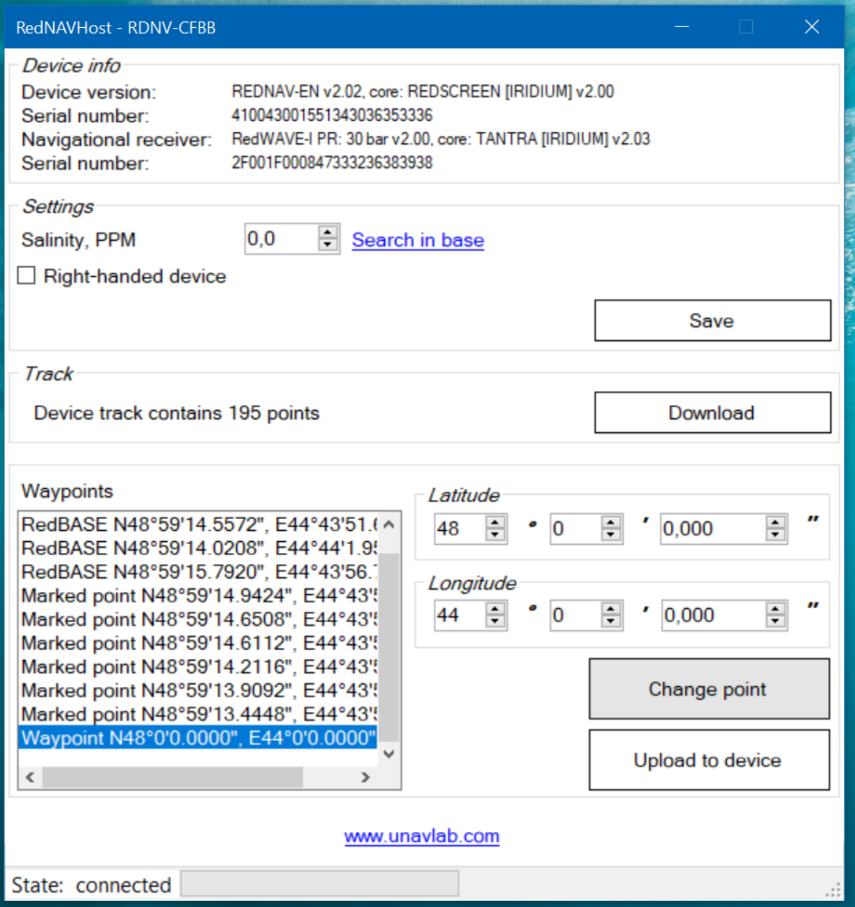 |
| Figure 9 - Editing an added waypoint |
To synchronize the list in the panel Waypoints with the device click the Download to device button. To clear all waypoints in the device:
- delete all items in the list
- click the Upload to Device button
- answer “yes” to the application’s prompt.